How Slicer Software for 3D Printing Works
Before choosing between Skeinforge and Slic3r, it is essential to understand exactly how slicer software works in 3D printing.
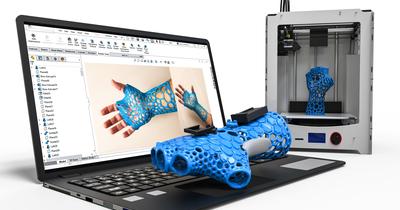
All objects start out as models. Through a series of photographs, sketches, and manipulations in 3D modeling software, users can create an image of the object they want to manufacture. This object is typically saved on the computer in the form of a stereolithography (STL) file that can be opened, closed, and modified at the user’s discretion.
When it is time to actually print the model, however, the STL file is of little use. It is a storage file format and cannot be read by 3D printers as instructions for manufacture. For nearly every 3D printer, these instructions must be in a numerical control programming language, commonly referred to as G-code. This is the language through which computerized tools, such as 3D printers, understand how to make something.
Slicing software is the medium through which STL files are converted to G-code. Once this conversion takes place, the 3D printer can perform functions such as:
- Rapid movements: this dictates the speed at which the printer moves between cuts
- Feed shapes: determines whether the extruder will feed filament in a straight line or arc
- Infills: tells the printer whether to fill the inside of an object to make it completely solid
- Supports: gives instructions on how to support sections of the object that are not built immediately on top of a previous layer
- Rafts, skirts, and brims: dictates how the object will adhere to the printer bed, with choices influencing how easily the finalized item can be removed from the bed
These are just a few of the instructions that the 3D printer must follow when creating an object. To manufacture the object exactly how you want it, the correct slicer settings are necessary to adequately convert the STL file to G-code, making the choice of slicing software essential.
Skeinforge vs. Slic3r: Settings
Slicing software breaks a computerized model into a set of horizontal layers. The 3D printer then builds the object by stacking these layers onto each other. Through the G-code instructions, the 3D printer can determine such factors as how much total material will be needed to complete the print and how thick or thin the extruder nozzle needs to be to make each layer.
As a user, the following are some necessary settings that you will alter in either Skeinforge or Slic3r to manipulate the G-code instructions and influence your final print quality.
Layer Height
The layer height will affect the final resolution of the print. If you choose to use thicker layers, the final object may appear to be a bit crude and grainy, while finer layers can make the final object appear more homogenous.
Although it seems like thin layers will make the “better” print, there are some drawbacks to trying to print in high resolution. First, it will take longer to print. Second, more layers increase the likelihood that an error may occur during the printing process (nozzle gets jammed, filament sticks, and curls), causing the need to abort the print and start over.
When exploring slicer settings, it is recommended to use .1mm layers for most prints. If you are looking to print in high resolution, go lower, and if you want to create a less defined final object, raising the layer height to .2mm should work.
- If you are interested in making prototypes in which intricate detail is not the primary concern, Slic3r will be the best option, as its factory settings make it easier for the user to install the software and get to printing models.
- However, if you want to adjust settings and make high-resolution prints, Skeinforge will be the preferred choice, as it provides an extensive array of settings pertaining to layer height that will allow the most extensive customizability.
Shell Thickness
This setting refers to the number of times that the printer traces the object’s outer walls before starting the hollow interior of an object. Shell thickness is a primary component in determining the final durability of the print.
Increasing the shell thickness will make an overall stronger object. For most objects, the standard shell thickness of .8mm is adequate, though if you want to make a watertight object, such as a cup or vase, it may be prudent to increase the shell thickness by a couple of ticks.
This is one of the most straightforward of all the slicer settings. Unlike most settings, it usually does not require manipulation of other settings to adequately execute a change in shell thickness. As a result, there is really no difference between Skeinforge and Slic3r when comparing along this line.
Retraction
This setting gives the printer instructions on when to pull the filament back from the nozzle and stop extruding. It is an essential component of intricate prints that do not have a continuous, solid surface.
Both Skeinforge and Slic3r will come with retraction turned on, as it is a useful setting for keeping too much filament from oozing out of the nozzle and creating imperfections in the final object.
The downside is that frequent retraction can cause the nozzle to become clogged more easily than when the filament is continuously being fed through. Even the briefest retractions can cause cooling at the nozzle tip backs up extrusion.
Although you will more than likely use retraction on both Skeinforge and Slic3r, you definitely want to choose Skeinforge if this setting is important to you. Manipulating retraction will allow you to make more intricate prints, and combined with settings such as layer height, you will want the software that offers the broadest range of possible choices.
Fill Density
This is a measure of how much filament is used on the inside of an object. It will be measured in a percentage. For example, when the fill density is set to 100%, the object will be completely solid with no hollow spaces at all in the interior.
Objects with a higher fill density will be heavier and stronger. However, they will also take more time to print and be more expensive to make, as they will require more filament.
Generally, objects meant for functionality will have a higher fill density (between 75% and 100%). In comparison, objects that are more artistic and meant for admiration will use a lower fill density (between 10% and 20%).
If creating functional objects is your primary purpose, Slic3r will be the best option. However, if fill density will be frequently manipulated, Skeinforge will be preferable, as it offers a variety of infill patterns that can help provide support to more intricate prints. However, it should be noted that many of the infill options on Skeinforge are exceedingly complex, with most of them unlikely to ever be used.
Print Speed
Print speed is the rate at which the extruder lays down filament. This is a critical setting because the ideal print speed is dependent on several other factors, such as layer height, filament used, and type of printer.
While some 3D prints take a frustratingly long time (a few hours, if not more), the temptation can be great to expedite print speed. However, increasing print speed can lead to many negative consequences, such as building on layers before they have properly set and overall sloppy print quality.
A general rule is to start the print speed at 50mm/s. If you are making simple, durable objects, this rate can be sped up. If you are making a more intricate object, definitely decrease the print speed.
This is another area where Skeinforge has the advantage. For those users who have a clear understanding of what they want to create and are experienced with adjusting settings, Skeinforge is the better software for making intricate prints as expeditiously as possible.
Supports
When printing a 3D object, there will generally be an initial layer that adheres to the print bed, with each subsequent layer snugly being added on top of that. However, some intricate designs will feature overhangs that will not be supported by this base layer, requiring the addition of support features that allow these overhangs to correctly set without drooping out of place.
Noted 3D printing expert Joe Larson coined the YHT rule, giving users an idea of which type of models will require supports to prevent drooping:
- Y: models in the general shape of a “Y” will not require support, as its gradual slope allows the base material to support to design without additional help
- H: this object will have a sort of “bridge” design, with the bridge in the center of the two bases requiring support to prevent drooping
- T: any object with this shape will require support on each overhanging side
Each of these programs will have two support options in their settings drop-down menu.
- The “touching build plate” option is used when a more pronounced support attaches to the build plate and can be added as an addition to the final print. This is good for less intricate designs and can be used effectively with either software.
- An “everywhere” support option is when the object is too intricate to have the support rising from the build plate itself, requiring the support to be attached to a previously set portion of the object. This may require several settings adjustments and should be attempted by more experienced Skeinforge users.
Skeinforge vs. Slic3r: Other Considerations
While the ability to manipulate settings is the most crucial factor when comparing Skeinforge vs. Slic3r (or any slicing software, for that matter), there are some essential considerations unique to each of these products that the user must look at before making a selection.
Cost
Both Skeinforge and Slic3r are free, open-source software options that are available with most 3D printing packages. They both have more than enough features to satisfy all types of printing enthusiasts, so it is unlikely that you will ever need to upgrade to a for-pay option when selecting one of these free programs.
Compatibility
The most powerful slicing software is of little utility if it does not work with your computer or 3D printer. Fortunately, both Skeinforge and Slic3r are compatible with all major computer operating systems, such as Windows, Mac, and Linux, and 3D printer types, including SLA, FDM, and DLP.
It is always worth double-checking compatibility based on your specific set-up before downloading either software. Still, you should feel confident that either of these programs will be compatible with what you are working with.
Adoption
These programs have been around for a long time and have been used successfully by many 3D printers.
Slic3r dates back to 2011 and has seen regular updates and improvements rolled out over the years. Skeinforge was one of the earliest slicing software products on the market, dating back even earlier than Slic3r. It rolled out concurrently with the RepRap project, making it one of the earliest players in the retail 3D printing market.
Specific Advantages
As favorites in the slicing software sphere, both products have many advantages:
Slic3r
While the features available in each make them strong choices for intermediate and advanced users, consumers agree that the stock settings in Slic3r make it possible to install the software and get to printing, making it preferable for beginners who have little experience in adjusting settings.
In addition, as one of the most popular and established programs on the market, many upgrades in the 3D printing field, in general, are made with compatibility with Slic3r in mind.
Skeinforge
Skeinforge boasts many of the same advantages as Slic3r, with its partnership with the RepRap project (an initiative to make self-producing 3D printers, leading to broader adoption by retail consumers) one of its strongest calling cards.
Its high degree of features, settings, and customizability make it one of the best options on the market for making intricate prints and is a favorite software among professional 3D printers.
Specific Disadvantages
You will be hard-pressed to find any significant complaints about either of these software options. However, both programs, even the less-complex Slic3r, can be intimidating for beginners. The plethora of settings, buttons, and drop-down menus can confuse people who are not exactly sure what they are doing.
Slic3r
Some users have noted that when using Slic3r, the print times and material estimates can be slightly inaccurate. This can lead to users waiting longer than expected for a print to be completed and the possibility of running out of filament in the middle of a print.
Skeinforge
As far as Skeinforge, some users have reported being unhappy with the stock settings. This has led to unexpected blobbing and gaps in finalized objects.
While the Skeinforge community recommends specific settings adjustments to eradicate these problems, the settings interface for Skeinforge can be truly intimidating for the novice, with the series of adjustments necessary to get the settings where they need to be more than what the average user would like to work through.
Conclusion
When printing a 3D object, it is necessary to turn digital 3D models into a set of G-code instructions for the printer to follow. This conversion requires the use of slicing software.
While many slicing software options are available on the contemporary market, Skeinforge and Slic3r are two of the most universally used. Each program is free, compatible with nearly every computer and 3D printer, and has a host of other strong points, making the final decision largely a matter of personal preference. However, if you are looking for software that allows you to install and get to printing, Slic3r is the better choice. At the same time, Skeinforge will be preferable for more sophisticated users who want to make specific adjustments to settings when converting files to G-code.
