What Is Layer Height?
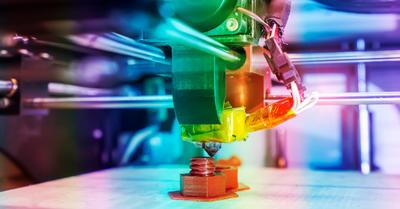
Before you can learn to adjust the layer height, you need to know what layer height is in a 3D printer. The measure that a 3D printer nozzle extrudes for every layer of a 3D print, which is generally in millimeters, is known as the layer height. When considering a detailed item, a significant layer height implies that the detail can only go so far.
It's like attempting to make a complicated structure out of Lego parts; the blocks are simply too large for the intricacies to show up. As a result, the lower the layer height, or "building blocks," the greater the quality, but it also means that more layers must be extruded to finish the same print.
Effects of Layer Height in 3D printing
The layer height you choose has a direct impact on the print outcome. Choosing the appropriate layer height is like choosing the resolution of a television screen. Lower layer thicknesses result in smoother surfaces. Every 3D printer's layer thickness may be adjusted, and it is sometimes also influenced by the process.
The layer height, on the other hand, has a considerable impact on the printing process. If the layer height is reduced from 300 to 150 mm, for example, printing takes twice as long and costs double. When there is lower layer thickness, more layers need to be applied on top of each other, which can result in a higher risk of errors.
What Layer Height Is Best for You?
Getting an answer to this question is easier said than done, mainly because it depends on one's personal preference and the particular project you are working on. The objective is to have the greatest quality when you print a 3D model. To get an exceptionally high degree of detail, you need to use a smaller nozzle diameter and a short layer height.
As a rule of thumb, you should 3D print things like a calibration cube at multiple layer heights and check the quality to correctly determine which is the best layer height for your print. When it comes to printing PPE face shields, the main aim is to have them done as quickly as possible. You would choose a larger nozzle and a large layer height, right up to where it is completely functioning.
It should also be noted that you need to factor in the layer height settings for a more accurate print. For instance, due to the nozzle's inability to extrude with adequate accuracy and precision, a layer height that’s too high for the nozzle diameter you’re using will make it difficult for layers to cling to one another. On the other hand, the PLA will be pulled back into the nozzle if the layer height is too low for the nozzle diameter and will also make it harder for the nozzle to push out the filament. This is why it is recommended that the layer height should always be between 25% and 75% of the 3D printer's nozzle diameter.
Another important factor to consider is that in 3D printers, you typically measure layer height using microns, with one micron being equivalent to 0.001 mm. Smaller layer heights are ineffective for objects with fine surface features; thus, printing them at a higher layer height (closer to 0.4 mm) decreases print time without losing strength or quality.
Smaller layer heights (near to 0.2mm) are only advised for prints that require superior surface finishes; however, this reduces the total size of the print due to the increased number of layers.
Layer Height for Print Speed
Increasing print speed is one of the reasons for adjusting 3D printer layer height settings. A higher layer height implies the printer doesn't need to print as many layers to obtain the same overall height, which means the print will be significantly faster.
In general, raising layer height lowers the print's resolution and quality. As a result, this "hack" is preferable for big prints, when close-up details will either be disregarded or fixed up during post-processing. Each print's layer height may be customized to achieve the fastest print speed while retaining a specified level of quality.
However, this is something that should be evaluated on a printer-by-printer basis. Each print's layer height may be customized to achieve the fastest print speed while retaining a specified level of quality. However, because printing efficiently necessitates a lot of fine-tuning, this should be considered based on your printer and the level of detail that you're aiming to achieve. You can easily find 3D printer layer height calculators online that you can use.
Layer Height for More Detail
The vertical resolution of most 3D printers is higher than the horizontal resolution. Why? Because the lead screws take longer to move, they provide a significantly more precise vertical position for the printer than the timing belts used for the other axis. As a result, the printer can produce more features on a vertical surface than on a horizontal surface.
Designers have begun to recognize and use this reality, and now you can, too. A 3D printer layer height that's too low will undoubtedly increase the time it takes to complete your print, but it will also allow for much more detail because the printer will be laying down more layers for a given height.
Now that you have all of the information you need regarding the layer height in 3D printing, it's time to go out and test some of the techniques and expert advice that has been shared here to create great 3D prints faster and with more detail.
