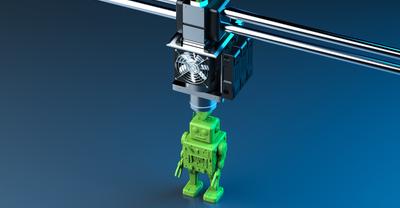
What Is Infill In 3D Printing?
Let’s get right to it. As the name implies, infill is the fill that’s in a printed 3D object. In other words, it is the internal structure of 3D prints or the material that is used to fill up the interior of objects that have been printed using a 3D printer.
Why Is Infill Important?
The infill provides a crucial function and has different levels of importance when it comes to creating 3D prints. Some of the main functions of an infill include providing better robustness to every object printed using the 3D printer, providing support for upper layers during the printing process, and adding in the necessary weight of a 3D printed object.
Types of Infill
While many different types of infill are used in 3D printing, some stand out. Here are some of the most used infill types in 3D printing;
Rectangular Infill
If you are using slicer software, this is one of the infill options that are almost always set on default. Rectangular infill is the preferred choice for many slicers and 3D operators since it ensures that the printed object is secured in all directions. A rectangular infill is especially useful when it comes to printing several layers that are perpendicular.
Wiggle Infill
Ask any experienced 3D printer operator (and we did), and they will tell you that the most efficient way of getting prints that are far more flexible and compressible is by using the wiggle infill. This is mainly because the zigzag design of this type of infill raises the rebound force, resulting in sufficient support during the coating process.
Triangular Infill
If you are using the 3D printer to create common structures that are found around us, you will need the object to have maximum resistance, especially in the directions of the walls of the 3D printed object. Since the triangular infill is at 45 degrees, it translates to the decomposition at half of the force applied by its shape while forming each layer, which results in stronger 3D prints.
Honeycomb Infill
And last, but certainly not the least, is the honeycomb, or if you want to get technical about it, the tri-hexagonal infill. The honeycomb infill is also commonly referred to as the bee panel, mainly because it mimics the shape of a beehive, as in its hexagonal-shaped interior compartments. Taking a page out of nature’s book, the honeycomb infill is, by far, the best option if you’re looking to create an object with a strong core when printing on a 3D printer.
This is one of the reasons why 3D printer operators that make objects out of carbon fiber or other fibers tend to use the honeycomb infill instead of others. The FDM/FFF in 3D printers provides each printed piece with the sturdiness and resistance it needs in every direction, which, in many ways, is even greater as compared to the rectangular infill.
That being said, while the honeycomb infill is the go-to option if you are looking for extremely sturdy prints, it comes at the cost of time. 3D prints created using honeycomb infills usually take a lot longer than other infill types.
Choosing the Right Infill
Now that you are familiar with the different types of 3D printer infills that you can choose from, it’s time for the next obvious question. How do you know which type of infill is right for the object you want to create on a 3D printer? Choosing the right configuration of the filling is critical to getting an accurate 3D print. Also, only the accurate infill setting will give your 3D printed objects the resistance they need.
As a rule of thumb, first-time 3D printer users should stick with a 10% density when printing prototypes or other non-functional items. When printing objects that will be exposed to normal to medium loads, an infill of 20% is recommended. For 3D printing items that will endure a substantial amount of load, it’s best to keep the infill setting at 60%. Also, when it comes to lamination programs, 20% is the most used percentage and is considered as standard mainly because it means you will get a 3D printed object that can handle a medium amount of weight and is quick to print on just about any 3D printer. Additionally, the percentage and infill type also has to be adjusted according to the particular 3D printer that you are using.
You also need to bear in mind the object that’s being printed. For instance, if you will be printing an item that is fairly complex but does not need to be rigid or robust, then keeping the infill percentage down to 10% will result in a quicker print, despite the object being complex. However, for those objects that require maximum tensile strength, 100% infill is the way to go.
The price difference between higher and lower infill choices might be significant depending on the shape of the model. Also, changes in infill percentage will have a substantial influence on the cost of models with larger internal space as compared to 3D printed objects that have thinner or smaller interiors. This is why when picking an infill percentage for a 3D print, consider print speed as well. A greater infill percentage means more time spent printing, especially on models with a significant interior volume.
