What Are Shells In 3D Printing?
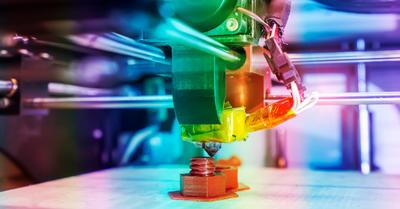
A shell in 3D printing is the outlines on the object layers from the extruder. This material is deposited during the printing process, and it’s considered a casing on the layer of the 3D printed object.
A shell is the outermost structure of a 3D-printed object. It is typically the last layer of material to be deposited and can be either solid or hollow. It also acts as a protective layer over the infill.
Shells also help with the strength of an object’s structure. The strength and weight increase when more shells are printed, but the print speed decreases. Slower print speed settings are required to create more shells.
The easiest way to define a shell is as the wall of a printed object. This boundary parameter is crucial to all print structures, and they get divided into a bottom layer and a top layer.
Why Are Shells Used In 3D Printing?
In 3D printing, Shells create an outer thickness to support the printed object structure. But using too many shells or adding too much shell thickness can result in a distorted object shape.
Shells are usually made of plastics, metal, or other materials that can be easily removed from the object once it has been finished.
Using more shells in 3D printing causes slower production and more material usage. They also allow more complex shapes to be created without printing the entire object simultaneously.
Everything else aside, the primary reason shells are used is for object strength and durability. When durability is not required, the shell setting is lowered, and vice versa when a part needs to be stronger.
Why Do Shells In 3D Printing Matter?
The shells of 3D printed objects are the outermost layer of the object. They are what give the object its shape, and they also determine how strong it is.
When designing a 3D-printed object, the number of shells needs to be calculated because it impacts the print time, material used, object weight, printing difficulty, and object strength.
Print Time
One of the main things shells do is increase or decrease the required print time depending on the thickness settings. When more shells are needed, it takes longer to create a 3D-printed object.
This can be detrimental for more extensive projects when time is essential. This is why it’s not recommended to keep the shell thickness the same on all projects that require different levels of strength or durability.
Material Used
3D printing with more shells will also use more material. This can be a waste if the printed object's shell thickness isn’t needed.
The higher the number of shells, the thicker the layers are. This can be a problem when there is insufficient space for these additional thicknesses.
Object Weight
When the number of shells is increased, each layer will be thicker, and thus the object's weight will also increase. The difference may be slight, but it can make a big difference over a more significant print run.
To lower the object weight, adjust the settings to reduce the thickness of each layer or choose a lighter material.
Printing Difficulty
Adding more shell thickness to a 3D printed object increases the printing difficulty. The shape becomes more complex, which can add more movements to the printer and the extruder.
This means adjusting other settings like print speed, temperature, and more.
Object Strength
Lastly and most importantly, the number of shells and wall thickness will determine the object's strength. This may sound great for all objects, but the other factors mentioned matter too.
Sometimes the best thing to do is sacrifice some strength to save time or material because the type of object does not need that much durability. These are critical considerations to make before printing.
How Do You Adjust Shell Settings In 3D Printing?
As discussed, the settings for 3D printing need to be adjusted to ensure shells and shell thickness is set properly. Things can go wrong quickly if not.
Shells are printed on all sides of a 3D object. To change the shell settings, open up the settings and look for Wall or Shell Thickness.
The default setting for shell thickness in Cura is 0.8mm. This provides minimal strength for a 3D printed object and should be increased to 1.6mm-2.0mm.
This range provides a good base for object strength and can be increased even more depending on the infill ratio and object shape. This equates to roughly three printed shells or walls.
The type of part determines how much shell thickness is needed. If durability is a primary concern, aim for around 2.0mm, but if strength is not required, anything between 0.8mm-1.2mm should suffice.
Depending on the printer type, it may require multiple settings adjustments for both the wall thickness and top and bottom thickness. On average, 0.8-1.6 mm equals 3-4 wall lines.
Difference Between Shells And Infills In 3D Printing
Shells are used in 3D printing to support the object at the outer layers as it is being printed. They can be made of various materials, most commonly PLA, ABS, or nylon.
This differs from an infill, but both are critical to the structure of a 3D printed object and the 3D printing process. Infills are similar to shells, except they are deposited into the center of a 3D printed object.
The printer prints out successive layers on top of each other, and these layers are only supported by an infill material when they are printed with shells.
The key difference between shells and infills is their impact on the object's shape. If too many shells are used, the object will deform into a curved block, whereas more infills won’t cause this to happen.
On average, many objects used between 2-5 3D printed shells for the outer layer. This combines with an infill of 20-30% to form a strong and reliable object that doesn’t lose too much shape or detail.
Infills are also printed in unique patterns while shells remain constant. The only thing that changes with shells is the total number printed, but infill patterns can change completely, and some patterns are stronger than others.


