It Comes Down to The Build Surface
While otherwise the same, the feature that sets these two machines apart is the build plate. It’s important to remember here that we are comparing these two products as they come, “out-of-the-box.” We’ll talk about a few possible modifications later on, but assuming no mods, there are two main points of comparison:
- Surface material and plate adhesion
- Build plate heating
Build Plate Surface Adhesion
Surface adhesion is important for 3D printing. Makers want their piece to stick to the bed while the machine is printing. This is necessary because if a part is free to slide around, it could become deformed, warped, or just all-around messed up. Think of any other manufacturing process; you need to hold a part in place while machining it. Same thing goes for 3D printing.
The two variables above are what affect plate adhesion. A heated surface will receive the hot extrusion material, but the material needs to be smooth enough to detach when it cools back down. One of the most reliable materials for this is glass.
The Creality CR-10 comes standard with a glass build surface, whereas the Tevo Tornado uses some sort of plastic. A common complaint among Tornado users is that their builds end up adhering to the build surface a little too well.
Removing builds after they are done can be a challenge with the Tevo Tornado. Some users report the need to pry models off with a razor or scraper. Depending on the rigidity and size of your model, this could be problematic. No one wants to break their build after waiting hours for it to print!
This is not really a complaint among Creality CR-10 users. Glass has the right capabilities to retain enough heat during a build and is smooth enough to allow parts to pop right off when complete.
It isn’t perfect, though. Some CR-10 users report an issue where one side of the glass is not completely flat. It may take some extra time adjusting the bed or flipping the glass surface to achieve a flat build surface. As for build adhesion, though, glass is the way to go. And it comes standard on the CR-10.
Build Plate Heating
As we mentioned, plate heating is an important part of this discussion. This is actually where the Tornado edges out the CR-10. Tevo has integrated a more elegant plate heating design. The Tornado features two separate power supplies:
- AC to power the silicon heating mat under the build surface
- 12V DC to power the rest of the machine (Steppers, controllers, etc.)
The AC voltage depends on where in the world you are, and both machines feature a switch between 110V and 220V to make them compatible.
The point here is that this feature in the Tornado equates to a much faster heat-up time, and it has an easier time maintaining temperature without an enclosure. (of course, ambient temperature comes in to play here as well.) In the race to the common PLA surface temp of 60°C, here’s how both machines stack up.

The AC heating element of the Tevo Tornado does make it appealing to those makers on the less patient side, and it arguably has a better capability to maintain higher bed temperatures. However, if you think big picture, the extra 5 minute wait for the CR-10 to heat up is worth saving whatever time and frustration comes with carefully removing a model that’s stuck to the Tevo Tornado plate at the end of the build.
Now, let’s not forget that we’re in the realm of open-source, 3D printing, and problem solving. Upgrading or modifying your 3D printer to some extent is nothing but a mere inevitability. So, while it’s completely possible to add a glass build plate to the Tornado, or use a mirror instead of the stock glass on a CR-10, it’s important to note that this article is comparing the two machines in the “out-of-the-box” state.
For that reason, we say the Creality CR-10 just slightly edges out the Tevo Tornado. In terms of general functionality, though, both machines are very capable of printing exceptional PLA quality.
Think Inside The Box
As we continue to consider these machines in the “out-of-the-box” state, let’s take a look at what actually comes in the box with each machine. Both are competitively priced sub-$400, so here’s what your money gets you.
In the Tevo Tornado box, you’ll get:
- Tevo Tornado 3D Printer Kit
- Control box
- Assembly Tool Set
- Assembly Instructions
- SD Card
- Power Cord
And in the Creality CR-10 box, you’ll get:
- Creality CR-10 3D printer (Mostly assembled)
- Control box
- Filament Holder
- 1 Spool of white PLA filament
- Assembly tools and instructions
- SD card
- Power cord
Both machines require some easy assembly, and instructions are included. This mostly consists of mounting the Y-axis rails and plugging in all the neatly labeled wires. The included SD card is also nifty because that is what you’ll be storing in your print code. (I prefer G-code)
You’ll notice that both kits are nearly identical, but Creality gives you two additional items that I find valuable. A spool of PLA and a filament holder!
While these items on their own are not an expensive extra purchase, just the fact that they are included means that the CR-10 comes out of the box ready to print. This is almost the 3D printer equivalent of the “batteries included” sales tactic.
Sure, PLA spools are cheap, and it’s easy enough to download plans for a filament holder and make that your first print on the Tevo Tornado… no problem. But again, the simple inclusion of these two items with the CR-10 makes it a better “out-of-the-box” option.
User Friendliness
When it comes to user interface, both machines are about the same. In both cases, you’ll be navigating a simple-to-use LCD display menu with a knob on the control panel box. Simple menu options like “auto-home” and “print from SD” make both printers pretty beginner friendly.
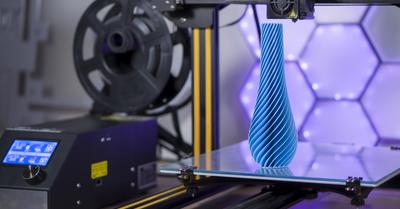
Each machine comes equipped with the basic features required for extrusion printing in a cartesian build space. They both feature vase mode as well, which allows for some really cool cylindrical builds.
The Tevo Titan Extruder
One thing worth noting about the Tornado is its incorporation of the Tevo Titan Extruder. This extruder has a few features that make changing filament and nozzle purging a breeze. While it features a standard filament locking lever, it also includes a feed gear that you can turn by hand.
The locking lever is super easy to use and allows you to push new filament through your extruder by hand. This is a pretty standard feature on all extruders, and the CR-10 extruder features one as well. Where the Tevo Tornado stands apart from the CR-10 is this feed gear. This feature offers slightly more control, and can be useful for those of us with an unsteady hand.
This is especially helpful when feeding softer or flexible filament in. It would be easy to apply too much force by hand, thus buckling the filament. Turning the gear feature by hand allows for a more gentle application of new filament and reduces the risk of buckling a brand new spool right from the beginning.
This is just one feature of the Tevo Tornado that makes changing filaments slightly easier, although it’s not as if it’s some impossible task with the CR-10.
Creality Community Support
The Tevo Tornado is a newer machine. It’s based on the open source design of the CR-10, and they are both based on the design of the Prusa i3 model, another similar open-source design.
So, while the younger Tevo Tornado design was able to make some improvements on the CR-10 (namely overall construction, which we’ll get to shortly), it does not come with the same invaluable support community that Creality has to offer.
Just take a look at both company’s websites, and you’ll get a feel for which one is more established. Creality has a comprehensive website. It’s easy to find the support and parts you need, and it has nearly seven times more registered forum users than Tevo does in their forum. (although I prefer the thingiverse forums for info about either model).
It’s a little bit harder to come by information on Tevo’s site. There’s no support email listed up front, but rather a sales email address. Many of the product descriptions are lacking plain formatting. These, to me are subtle signs that Tevo is not suited as well as creality is to support its customers.
The CR-10 Is An Open-Source Design
Open-source can be a double-edged sword sometimes. For those deep in the DIY world looking to tinker and make their own modifications to the 3D printer they buy, we then recommend the CR-10.
Creality’s design for the CR-10 is open-source. The TEVO Tornado was based off of an open-source design, but the CR-10 is open-source. This means that those who feel so inclined can go download the CAD and control code for this machine, making their imagination the only limit on what kind of modifications they can make.
This doesn’t mean that the Tornado cannot be modified at all, no way. There are plenty of modifications available, but you might find a little less freedom available. If we return to our objective about comparing the two machines as they come out of the box, though, this argument doesn’t really carry much weight in favor of one over the other.
Open-source is nothing more than a preference in this context, and we just wanted to provide this information to those who value it.
Machine Construction
Again, we’re talking out-of-the-box here. There are a couple things to point out, and these two 3D printers are so similar that we’re really splitting hairs at this point.
- The Tevo Tornado sports an all metal construction
- There’s a chance the Tornado comes with slight a Z-limit switch issue
- Screw placement makes it easier to replace the build plate on the CR-10
- Assembly is quick and easy for both
The All Metal Tornado
One of the biggest boasts that the Tevo Tornado can claim is the all metal construction. All the frames, brackets, and enclosures are made from metal. Creality cannot claim this for their CR-10, as some of the brackets in its design are made of 3D printed plastic, ironically enough.
If longevity is of importance to you, then it may be worth purchasing a Tornado and making the upgrade to a glass build plate. It’s a relatively simple upgrade to perform; you’ll just have to navigate the pesky screw placement when doing so.
Again, while both machines are certainly capable of producing great 3D prints, there’s just something about an all metal design that puts your mind at ease.
Watch Out For A Z-Limit Switch Fault
One popular YouTuber pointed out a minor hiccup during his unboxing and review of the Tevo Tornado. It had to do with the mounting of the Z-Limit switch. He noted that it appeared to be slightly bent out of shape, or off in such a way that the gantry was hitting a nearby circuit board before contacting the Z-limit switch that would bring it to a stop.
He proposed a quick and easy fix that seemed like no big deal, but it’s just something to be aware of when setting up a Tornado; if that’s the machine you choose to go with.
Swapping Baseplates on The CR-10 Is Easy
The CR-10 has a base plate mounted in such a way that the screws holding it in place do not protrude into the build surface. This makes replacing or upgrading the build surface a bit easier, especially glass since it doesn’t involve the need to drill holes.
There are a few workarounds to this for the Tevo Tornado floating around the forums, but I was not too keen on one that suggested just buying a smaller piece of glass to fit within the screw array. This would limit your build volume, at which point it’s just worth it to buy the CR-10.
Both Machines Are Painless to Assemble
While these printers do not come out of the box fully prepared to start printing, there is only a minimal amount of simple assembly to go through. Enough to almost consider it fun.
While more or less the same, assembly of both involves the following steps:
- Mounting of the Z-Axis frame, which includes the already assembled X-axis gantry, to the pre-assembled base frame.
- Plugging everything in.
Both kits come with an allen key included, so no need to dig into your tool chest to assemble either. All the wires are labeled, so it should be clear where they get plugged in. Assembly takes around 20 min. And since we’re splitting hairs, the CR-10 has a tad bit more assembly because it comes with a filament holder… so that has to be screwed on as well.
Finally, Some Technical Specs
Because these two machines are so similar, this article has been focused thus far on some key hardware differences and their impact on user-experience. Let’s now dig into the technical differences. While none of these individual stats on their own can be used to make the large claim of “which is better,” they can certainly help inform you, a buyer looking for the right 3D printer.
So here we have them:

A lot of info to swallow, and it doesn’t really paint a glaring picture that says, “this one’s better!” So let’s break down each spec and understand what it means a bit.
Higher Print Resolution in The Tevo Tornado
Since the build size is the same for both, big, we’ll skip ahead to print resolution. The Tornado does slightly edge out the CR-10 here. A higher print resolution just means thinner layers, or slices, each time the extruder makes a pass. The smaller the layer thickness, the higher the print resolution, and thus the more detail you can print.
Both machines feature a 0.4-millimeter nozzle, the standard setting for layer thickness will be half that, 0.2mm. This is a resolution of 200 microns. The Tevo Tornado can get down to 50 microns, while the CR-10 can only go to 100. You’ll probably find that 200 microns produces great quality prints, but if your sole focus is print resolution, then the Tornado may be your printer.
It’s important to note that print resolution is inversely related to the total print time. I.e., the thinner the layers (higher resolution), the longer the build will take to print. Just something to keep in mind as we make our way down the list and later touch on print speed.
Slicer Compatibility
If you’ve 3D printed before, you’re familiar with slicing software. If not, you’ll need to choose from a vast array of options. All slicers do the same thing, but they are not all created equal; a topic for another blog post.
We’re not going to go into too much detail about slicing software here, but we will note that both the Creality CR-10 and the Tevo Tornado are compatible with Simplify3d.
Print File Literacy
After your slicer processes the model, it writes out the control code for the printer to read. Both of these machines are programmed to read the most standard format, G-code. While the CR-10 can read OBJ format, there’s no difference here. Both printers will print what your slicer writes out.
Build Speed and Volume
The speed at which your extruder can lay down material is another parameter that will impact how long it takes to print a part. The Tevo Tornado again carries a slight advantage over the CR-10. While a 50mm/s margin may not seem like something to write home about, it is 1.5x faster. So over the course of a multiple hour print, you could see significant savings in print time.
Consider an example. With all other print settings equal, a model that would take 5 hours to print on a CR-10 could take under 3.5 hours to print on the Tevo Tornado. Now, the extruder is likely not operating at maximum speed the entire time as it navigates intricate turns, but you get the idea.
This could equate to long term time-savings if you are producing many of the same model in high volume. It could also make up for lost time when printing at higher resolution. But for a general enthusiast, not much of a game changer.
Cost and Availability
Finally, the bottom line. How much does each one cost? The prices listed above were taken directly from each manufacturer’s website.
Speaking broadly for all 3D printers, these two models give you serious bang for your buck. Like any other variable in this comparison, price is also neck-and-neck. The price will vary depending on where you shop, but if you see one for over $400, you’re getting a raw deal.
For the sake of this comparison, we’re going to stick with the manufacturer’s prices and let you do the deal hunting.
For $379, you get everything you need in a 3D printer with the CR-10. Sure, it isn’t all metal, but the standard glass build plate is really what makes this price shine. The Tornado is already $20 higher, and if you want to modify it to be on the same “ease-of-use” level as the CR-10, then you’ll spend around another $20 to add a glass base plate.
Don’t forget what’s included in the box, too. The Tevo Tornado is slightly more expensive and does not come as equipped as does the CR-10. You’re missing out on an included spool of PLA filament and a filament holder. Again, not huge expenses, but if you’re already spending more money, you’d like some of the same stuff as the competitor!
What that extra $20 does get you is a durable, all metal construction, and a nifty AC heating element that equates to faster heat-up times. It also affords you a slightly nicer extruder with a gear feature.
Another bit of information worth noting is availability.
At the time this article was written, both of these models were listed as sold out and on back-order by their manufacturers. And they’re coming from China, so lets not forget shipping time.
Luckily, spare parts for both machines are relatively easy to find since both are based on an open-source design. The extruder nozzles, the NEMA motors, etc. are all pretty standard. Although again, the CR-10 open source design makes it easier to be sure you’re getting the right part if you did need to order one.
The only spare part available on Tevo’s website is the Titan Extruder, while Creality seems to have a more comprehensive list of available parts.
The bottom line on price: the CR-10 is a slightly better deal.
So… Which One Is Better?
We just threw a lot of information at you, and hopefully, it helps you make your own decision as you plan out your new life with an affordably priced 3D printer. Ultimately the call is up to you, the end user, but we’ll give our opinion for what it’s worth.
We gave a lot of weight to the CR-10’s standard glass baseplate, and we’re going to stand by that argument. The two machines are just so similar otherwise.
Out of the box, we recommend the Creality CR-10 due to the overall readiness and lack of frustration when getting builds “unstuck.”


